Hi darlings!
I hope your week is going well :-) Today is the last installment of the How to Grow Your Instagram series. So far, we have talked about branding, different growth strategies and I've given you a peak into my daily routine. A lot of you have asked about my photo editing so I thought I would share today!
Keep in mind that I definitely not a photography expert. In fact, I'm still very much a beginner and learning new things everyday. I have been experimenting with different edits and am still going through this process. With that being said, although I may change things up a bit in the future, I am going to share my current editing process with you.
Firstly, I edit both my blog photos and my instagram photos differently. I have a specific theme for my instagram: light, bright and airy. These are edits that I done completely on my own through trial and error. For the blog, I solely use Lightroom (no photshop) and for Instagram, I use either A Color Story or Vsco and then do additional edits in the Instagram app itself. I have been using VSCO a lot more lately, so I will use those edits for the two examples below. They are not exact because I change it up a lot of the time depending on what the photo looks like to begin with, but this will give you a good idea.
My Flatlay
1.) Original Photo (no edits): Taken with a Canon Rebel t6i with stock lens in natural lighting
2.) Lightroom Edit: I currently use presets from both Dreamy Presets and Pretty Presets. I use Pretty Presets 99% of the time and used one from the Pretty Films Collection for this photo which basically decreased saturation a bit, increased sharpness, decreased shadows and increased highlights. I additionally increased the exposure and upped the warmth a bit.
3.) VSCO Edit: I use HB1 for the majority of my photos, but also love HB2. HB1 gives that light and airy feel. I play around with it until I like it (usually between +5 and +7). After the filter is on, I increase exposure and sharpness once again.
4.) Instagram Edit: After VSCO, I upload the photo to Instagram and begin final edits. These edits vary depending on lighting, saturation and other things. For flatlays, I always increase the exposure quite a bit because I like them very white and bright. I will then decrease warmth (because I like it cool WHITE), increase shadows, increase sharpness, sometimes decrease saturation, put a slight color tint then crop.
*Sidenote: If you are having trouble with your flatlays, I recommend checking out these my two part mini-series here and here.
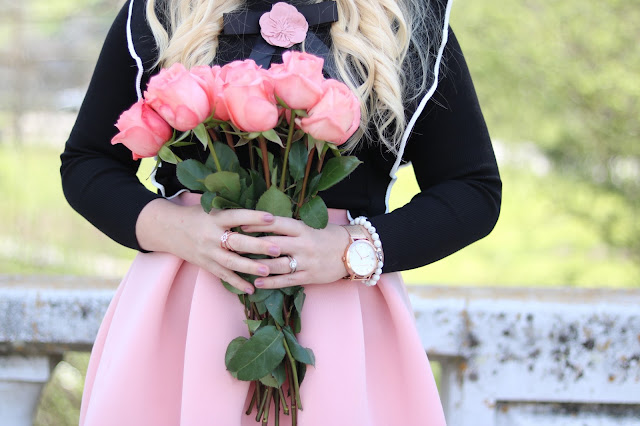
Outfit Photos and Detail Shots
1.) Original Photo (no edits): Taken with the Canon Rebel t6i with 50mm lens in natural outdoor lighting (in shade - always in the morning, facing west)
2.) Lightroom Edit: Once again using one of the presets from the Pretty Films Collection for this photo which basically decreased saturation a bit, increased sharpness, decreased shadows and increased highlights. I additionally increased the exposure and upped the warmth a bit.
3.) VSCO Edit: Again using HB1 (usually between +5 and +7). After the filter is on, I increase exposure and sharpness once again.
4.) Instagram Edit: After VSCO, I upload the photo to Instagram and begin final edits. These edits vary depending on lighting, saturation and other things. I edit outfit and detail shots different than my flatlay shots. If I increase brightness, it will only be a little bit. I will then decrease warmth, increase or decrease shadows (I usually decrease when wearing black because I still want the photo very light feeling), increase sharpness, sometimes decrease saturation, put a slight color tint then crop if needed.
I know this was a pretty general post because I don't have an exact formula for editing. I edit based on what looks good to me and what I feel looks good with my feed, which means that most of the time I will edit an image multiple times before it's posting (it's the perfectionist in me haha!). With that being said, I do hope that it has been super helpful for those of you wondering what I do! Definitely experiment and see what aesthetic you like, whether that's light and bright, dark and moody, colorful and fun, or a variation of all of these. Editing photos is where your brand really gets to shine and stand out from the others so I think it's important to make it you own :-)
Well, that concludes the series! I'll have more for you once I get ready to launch my course (it will still be a little while) but I hope that what I have shared has been super helpful for you. If you have any other topics you'd like me to cover about anything at all, let me know in the comments below!
My question for you:
How do you envision your Instagram feed editing-wise (if you haven't done so already and if you have, what is your aesthetic)? Don't forget to leave your IG link below so we can all support you!


No comments:
Post a Comment